This article provides a step-by-step procedure for removing the engine compartment trim and windshield frame trim.

Sometimes, to repair the engine compartment, it is necessary to remove the noise insulation upholstery, for example, to replace the brake master cylinder. Also, the reason for this may be torn sound insulation (you will notice this by the increased noise in the cabin).
To carry out these works, the following tools are useful: a flat and Phillips screwdriver, pliers, a set of heads and wrenches.
The whole procedure was carried out on a VAZ 2110 car. On other VAZ cars, the procedure is not very different, it is very similar.
Procedure for removing the engine compartment trim and windshield frame trim:
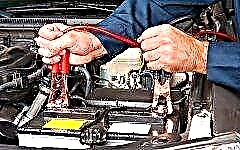
1. It is necessary to disconnect the wire from the "-" terminal of the battery.
2. Open the hood and then remove the rubber seal.
3. Unscrew the upholstery fixing screw, which is located under the brake cylinder.
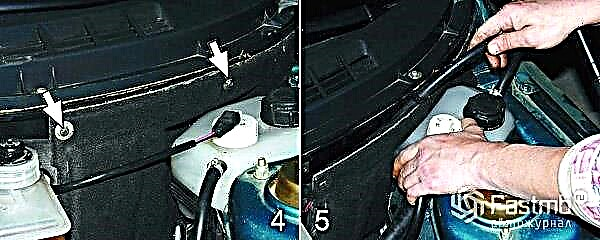
4. Then you need to unscrew the two upper mounting screws on the left upholstery.
5. From the liquid level sensor, you need to disconnect the block with the wires in the expansion tank, unfasten the tank fastening belt and take the tank slightly to the side. At the same time, you must remove the heating steam hose from under the left upholstery.

6. It is necessary to remove the left upholstery.
7. The clamp for fastening the hoses to the casing must be unfastened.
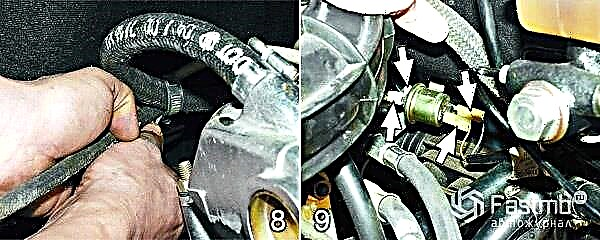
8. You also need to unfasten the clamp holding the vacuum booster hose to the casing. 9. After that, you should disconnect two blocks with wires, as well as two hoses from the electro-pneumatic valve.

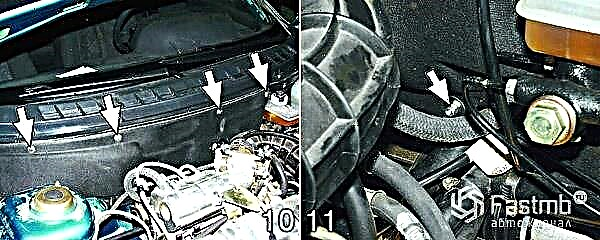
10. It is necessary to turn the four screws in the upper fixing of the right-hand casing
11. Then unscrew the nut in the lower trim of the upholstery.

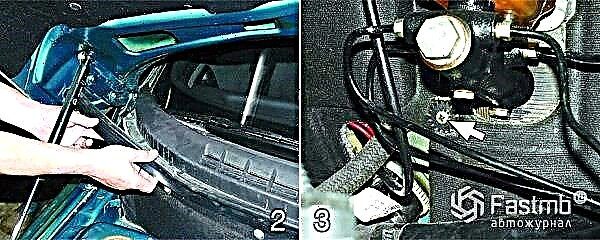
12. In the following way it is necessary to loosen the tightening of the nut fastening the bracket of the protective casing in the steering mechanism.
13. You need to remove the right trim.
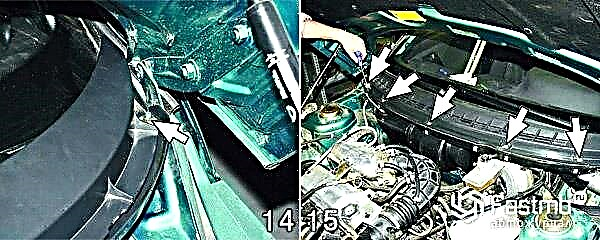
14. Then unscrew one nut on both sides of the windshield frame lining.
15. Remove the remaining 5 nuts securing the windshield frame trim.

16. It is necessary to remove the lining, while disengaging its hook from the lining.
17. It is necessary to disconnect the washer hose from the tee.
18. Remove the brush arms.
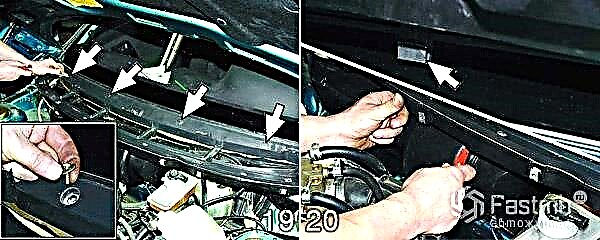
19. Slide out the four plugs and remove the several screws with lock washers underneath.
20. Pressing the latch with something, lift the cover.

21. Remove the washer hose from there.
After you have done all your business and start assembling the upholstery of the engine compartment and the lining of the windshield frame, then the procedure is carried out identically in the reverse order. Assembly problems should not arise.